I’ve been wanting to make homemade ricotta for a very long time but there always seemed to be a good reason to postpone the experience. I finally promised myself that the day whole milk came on sale I would no longer have an excuse.
I find the quality and taste of store-bought ricotta inconsistent, at times watery other times very dry and altogether lacking in that sweet, delicate taste of good ricotta cheese.
Whole milk which rarely comes on sale finally did last week as well as 35% cream being the two main ingredients needed to make ricotta, I knew the stars had finally aligned and took it as a sign that it was time!
They say the stars align when an unexpected and nearly impossible event takes place, usually due to pure luck or divine intervention. I say it was a matter of coincidence that both ingredients came on sale at the same time and no better time to keep the promise made to myself and finally try this recipe.
The process couldn’t be more simple and results most satisfying after succeeding to make homemade cheese!
So what to do with over one and a half pounds of absolutely fresh, sweet deliciousness? Ricotta on toast for breakfast for sure and a batch of ricotta filled Manicotti for Sunday dinner.
Won’t be waiting for any stars to align before making this ricotta again!
Ricotta Cheese Homemade
8 cups (2 quarts) whole milk
1 1/2 cups whipping cream 35%
1 teaspoon coarse salt
1/4 cup fresh lemon juice, strained to remove pulp
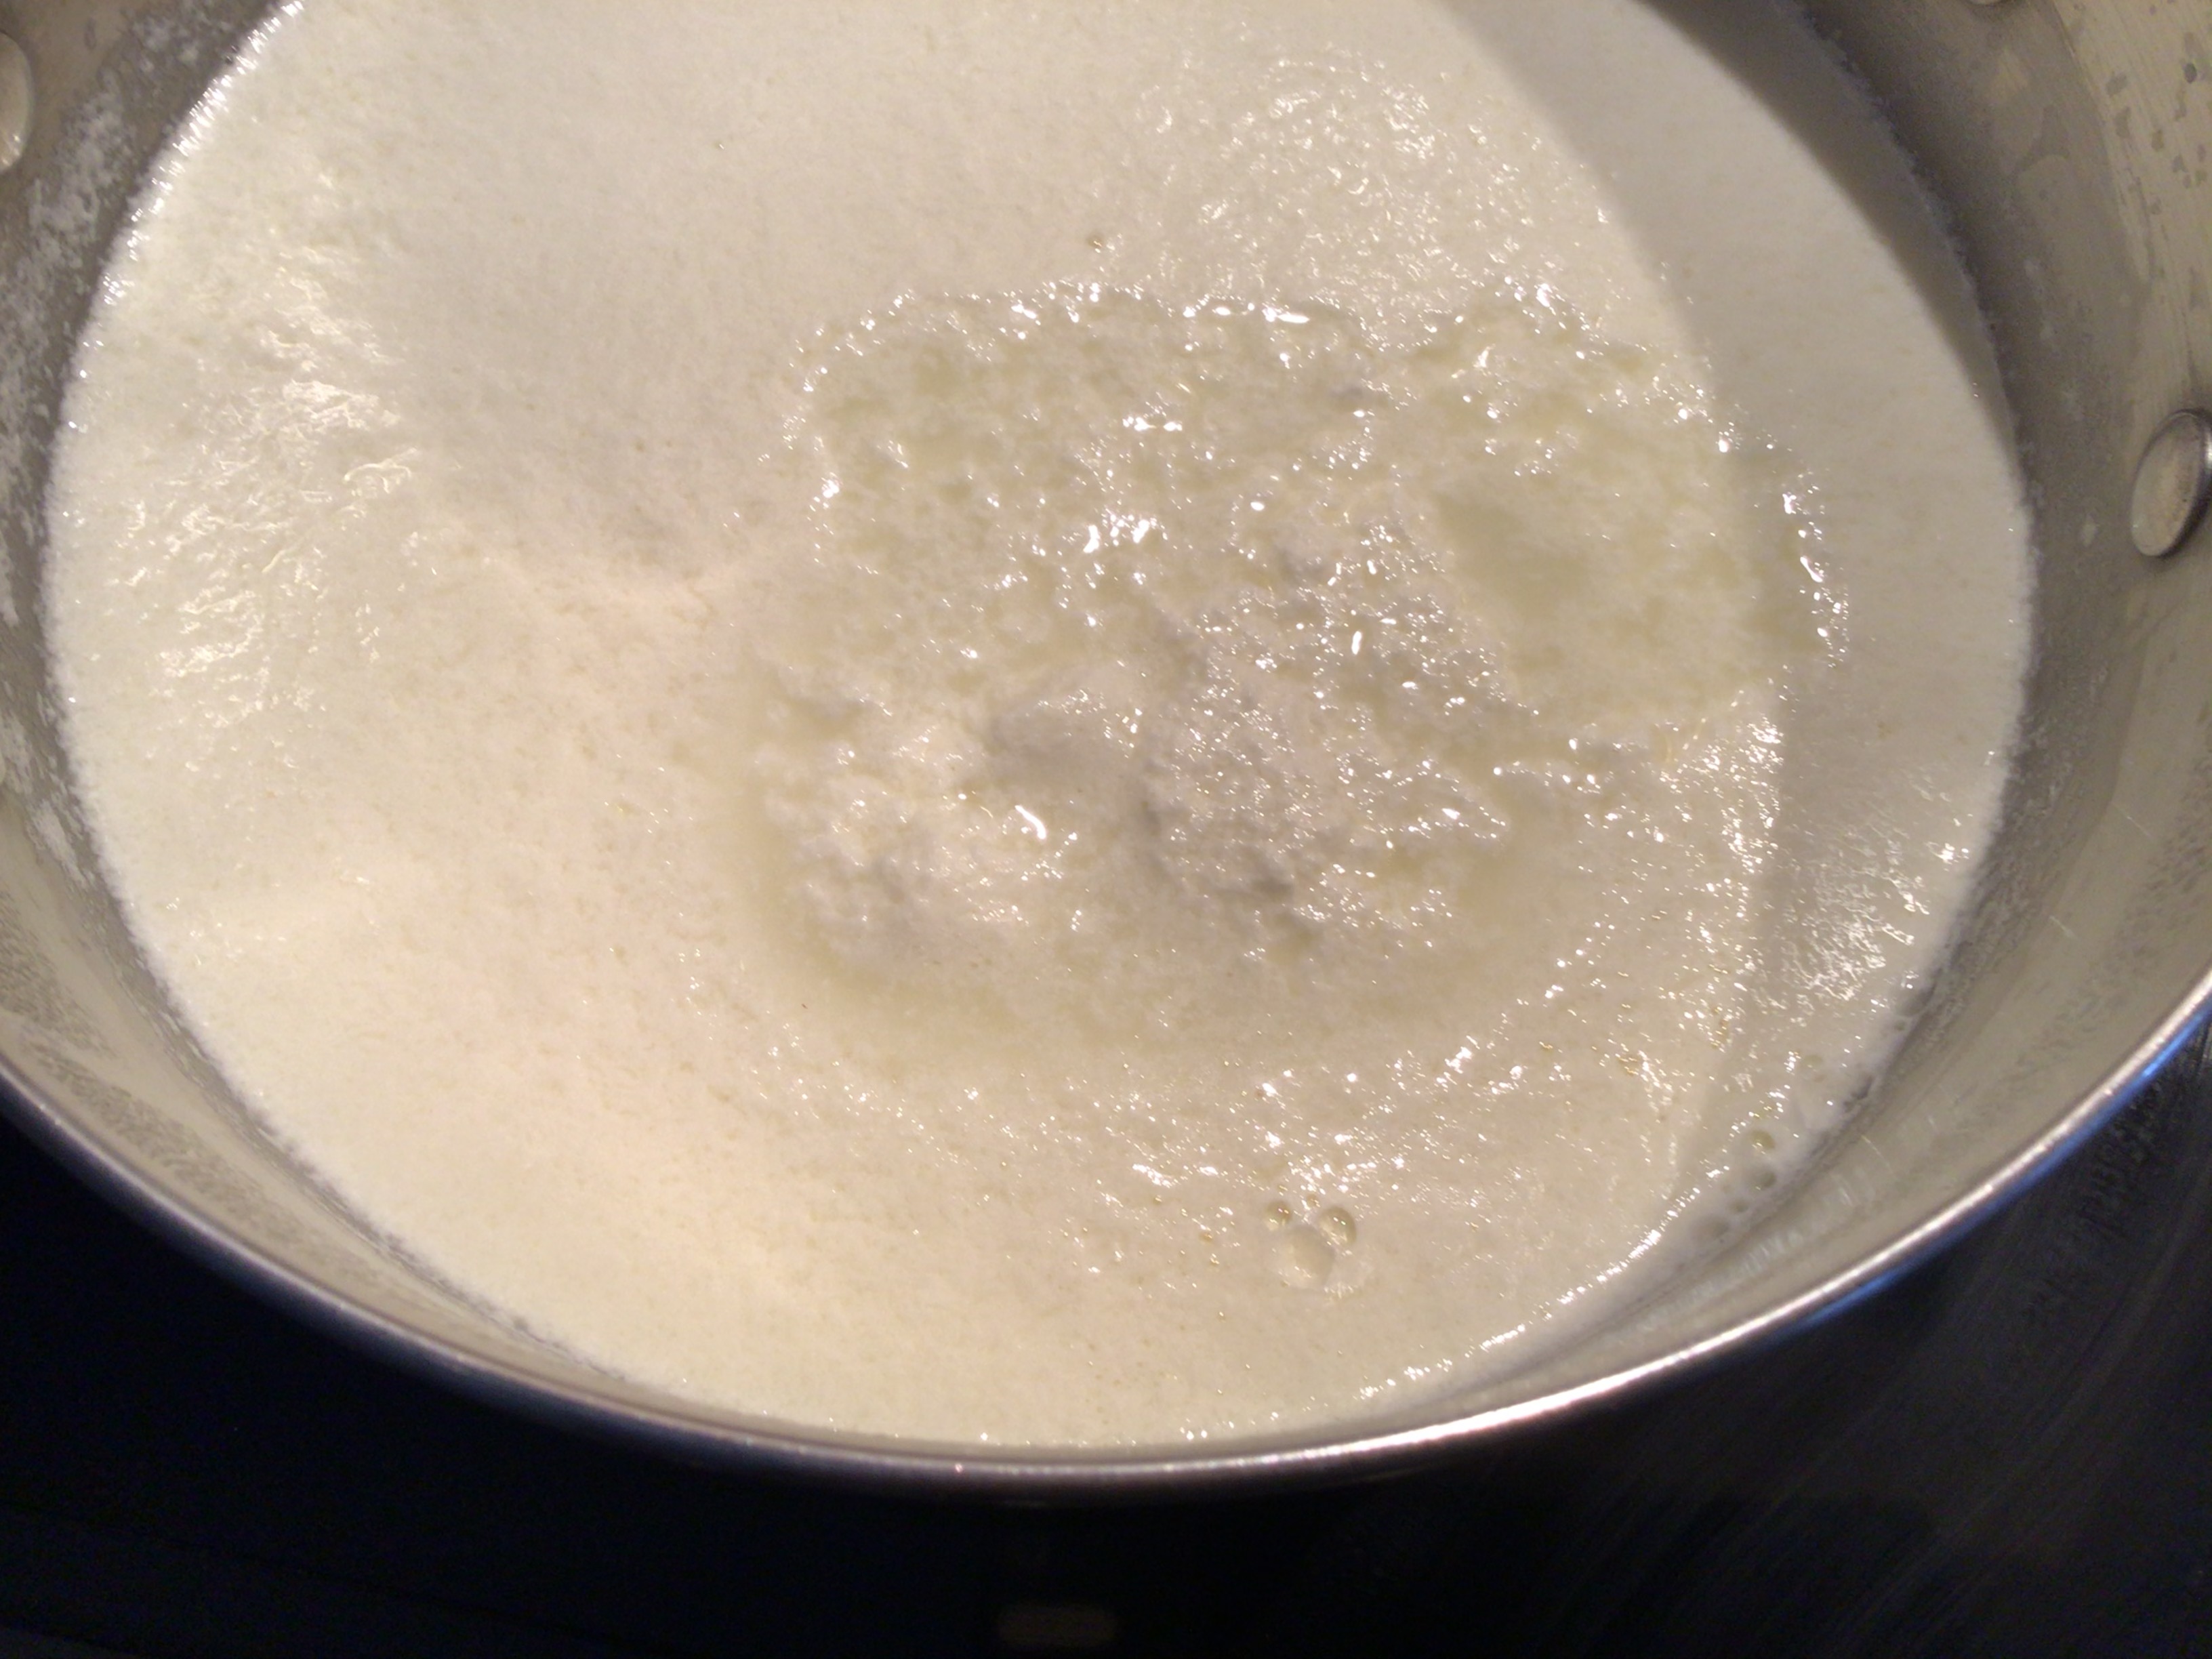
- Combine milk, cream, and salt in a 4- to 5-quart pot, and warm mixture over medium-high heat stirring frequently with a wooden spoon or spatula to prevent scorching, until mixture registers 195 degrees on a candy thermometer. It should take about 15 minutes.
- Add lemon juice, gently stir until just combined. Remove pot from heat and let stand 5 minutes. The combination of the acid and residual heat in the mixture will cause it to coagulate or curdle — separating into a soft mass (curds) and a cloudy liquid (whey).
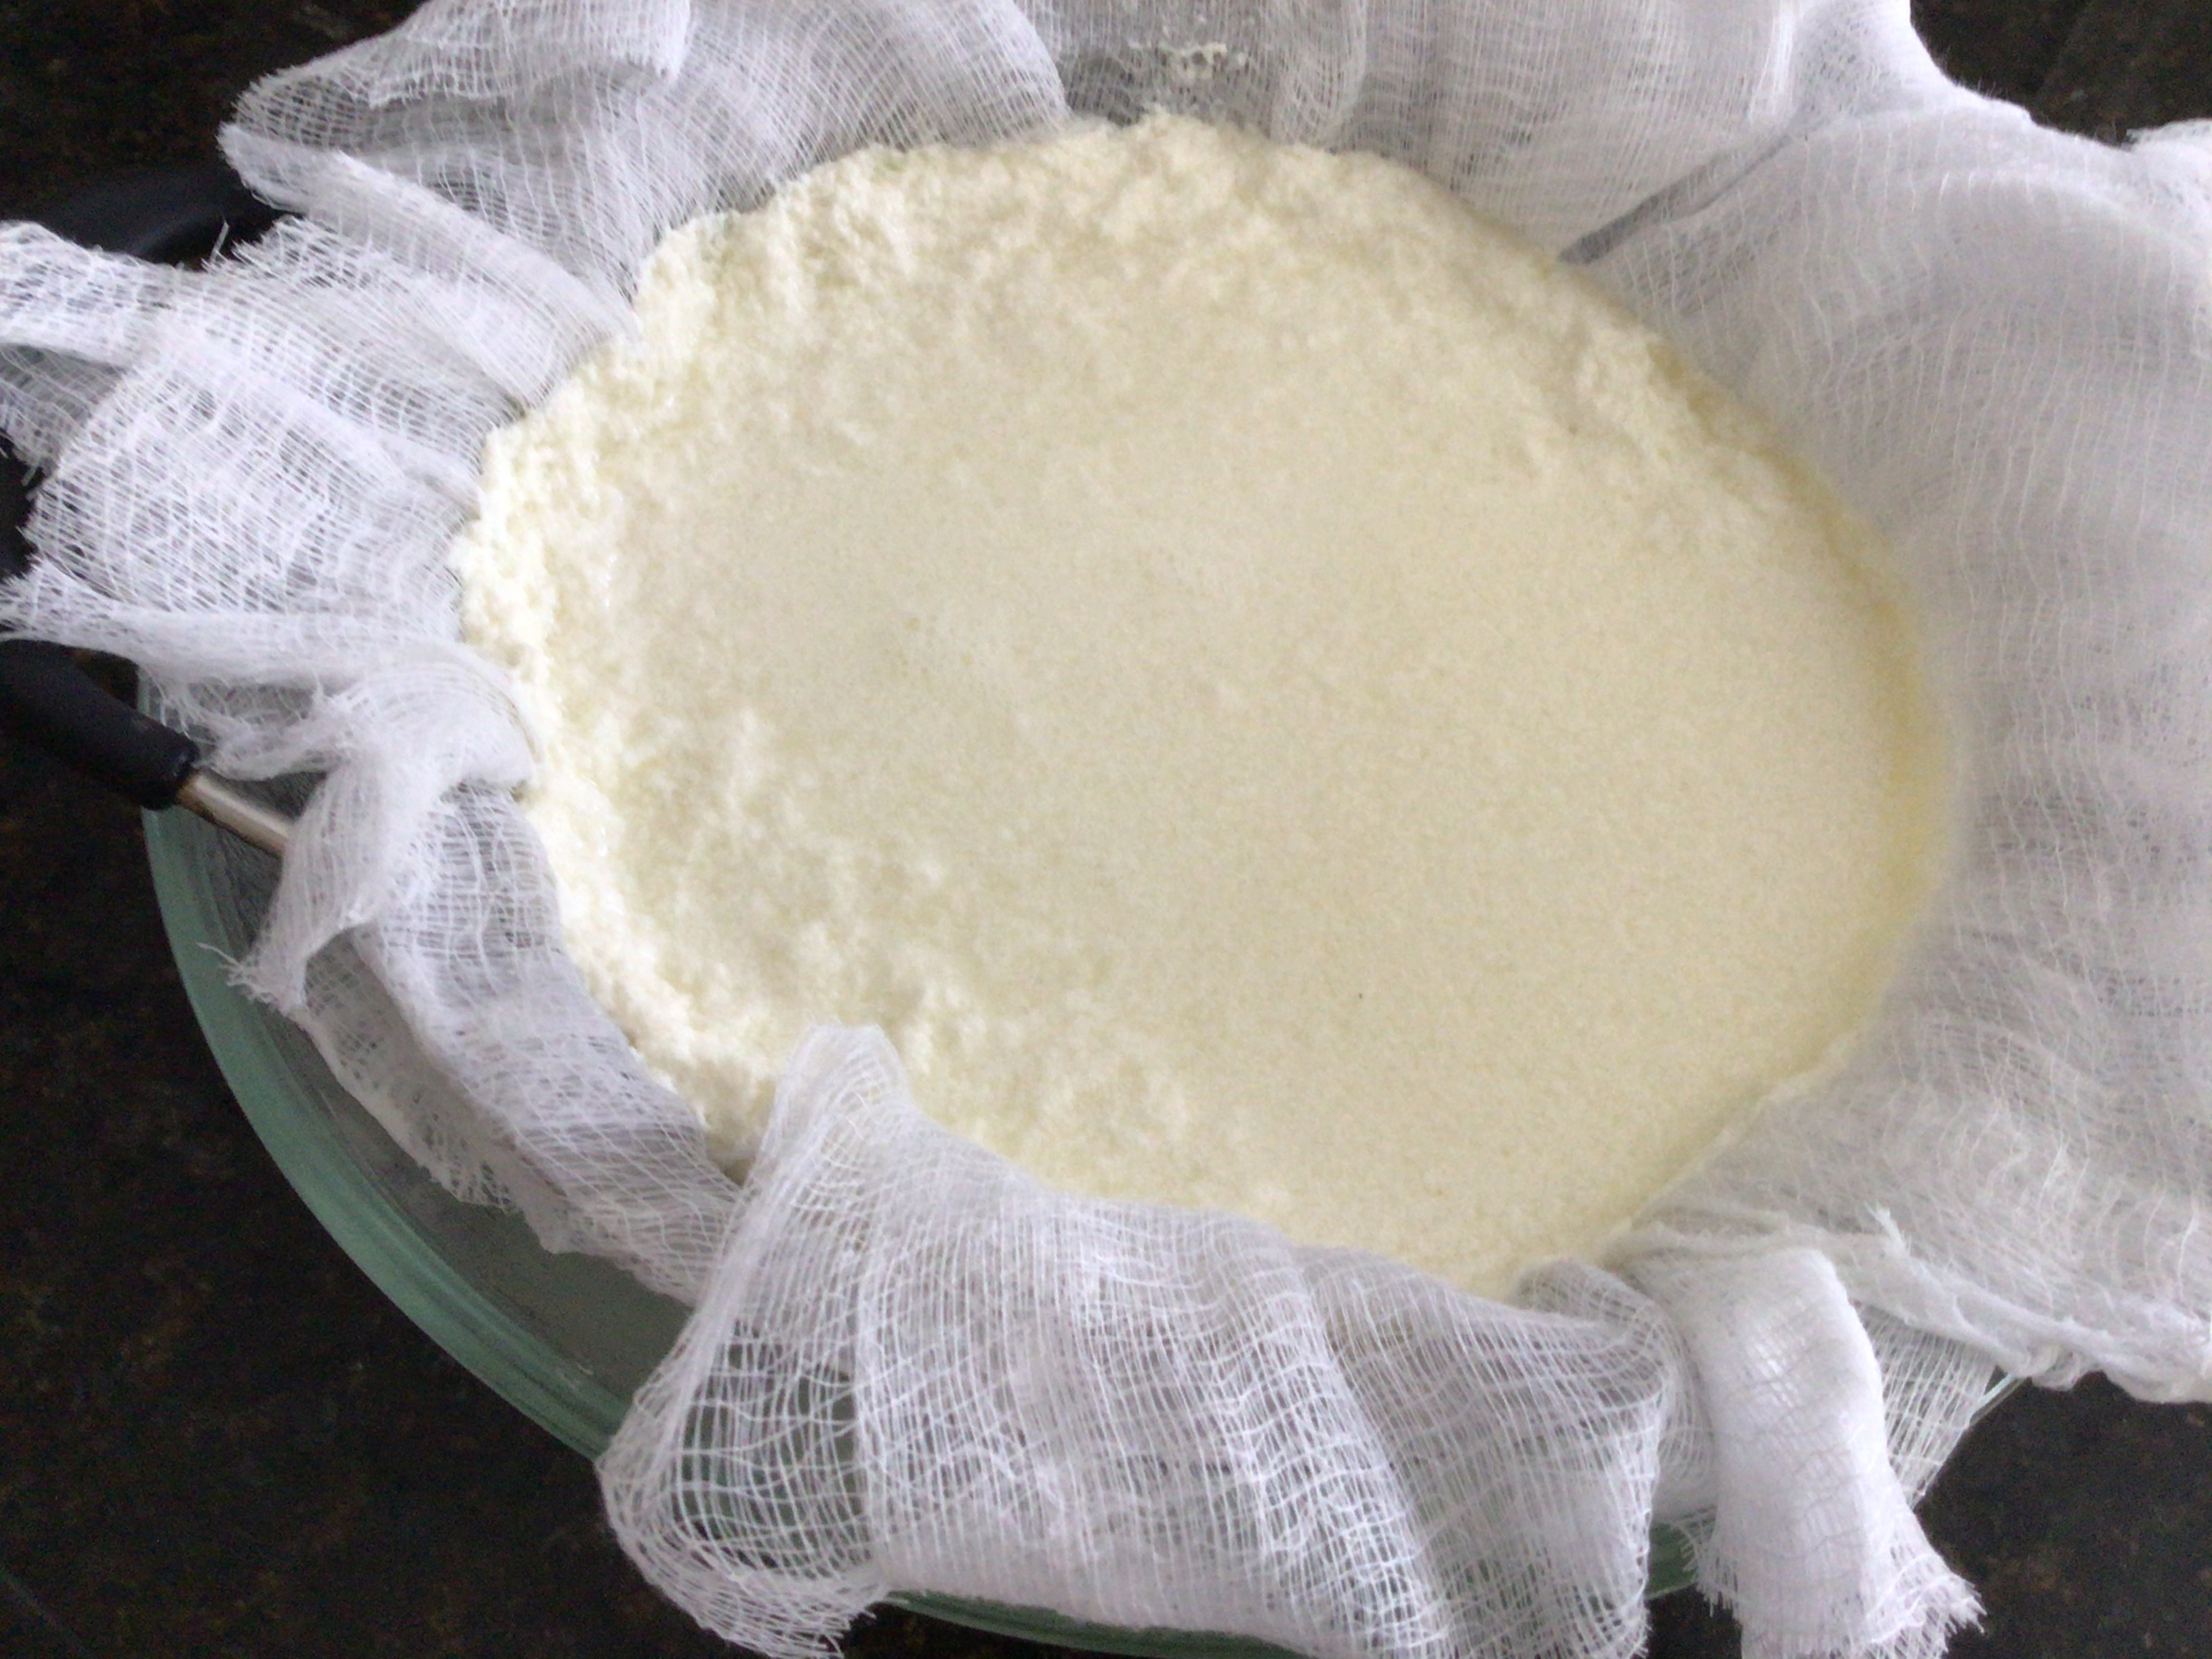
- Line a mesh colander with a triple layer of cheesecloth and place inside a deeper, slightly larger bowl.
- Gently pour curds and whey into colander. Let mixture stand, pouring off whey occasionally until most of whey has drained from curds, about 20 minutes.
- Turn ricotta out into a bowl and serve within a few hours or refrigerate up to 4 days.
- For a denser ricotta, which can be preferable for baking, hang it to drain for another hour. Discard whey.


Notes. Tips and Suggestions
- After pouring the curds and whey into the cheesecloth lined colander I let the mixture drain longer than 20 minutes as I found it to still be too soft and wet.
- I also tied up the cheesecloth and hung it to extract a little more whey making a perfect consistency. The knobs on my kitchen cupboard made the perfect place to hang the ricotta.
- The yield of ricotta from these ingredients was a little over 1 1/2 pounds.
- This recipe will be easy to cut in half if a smaller amount of ricotta is required.
- It will be hard to ever reach for a tub of grocery store ricotta after making this.

This rustic little duo was given to me many years ago by my sister after her trip to Calabria Italy. We share the same appreciation for interesting pieces with handmade charm. You might never guess that it’s a bocconcini drainer which drains the excess water from those delicious, soft cheese balls. The lip on the lower dish makes it easy to drain away the liquid. Is it an essential item? Definitely not, but one with an interesting story to tell!